30,000+ students
1,000+ Ratings ⭐⭐⭐⭐⭐
Featured by Musictech, Keyboard Magazine & Electronic Musician

Synth Tutorial: Chvrches “Gun”

In this synth tutorial, Joe Hanley, the creator of Syntorial, will take you step-by-step as he rebuilds the introduction from Chvrches “Gun”. Joe will be using mostly free and donationware plugins, and will focus on classic hardware synth emulations. Don’t forget to download the presets and MIDI files. Plugins used:

VIDEO TRANSCRIPT

Hey everyone, today I’m gonna show you how to remake these synth patches from the intro of Chvrch’s “Gun”. I’m gonna be doing these videos on a regular basis on different sounds, songs, techniques and stuff like that. And I’m taking requests. So if there’s something you want to learn about, just click the link at the top of this video, it’ll take you to the Syntorial website’s tutorials page. And on the right side there’s a forum where you can submit a tutorial request. Type it in, send it and I may cover it in a future video.

On this page we’ll see this video along with many others, check them out while you’re there and below each video, there’s a download link where you can get the presets and MIDI files from the video. And if you wanna be notified when a new video comes out, just scroll down to the bottom of the page and sign up for our newsletter.

Lastly while you’re there, check out the free Syntorial demo, which comes with 22 free synth lessons. Syntorial is synthesizer training software that teaches you how to program synths and design sound, all by ear using videos and interactive challenges. So check it out.

So for this video, we’re gonna be using mostly donation ware and free plugins. All except one, and whenever I open a new plug-in a link will appear at the top of the video so that you can go and get it. So now let’s listen to the finished patches before we start building them from the ground up. So starting with the bass, we’re gonna use Moog.

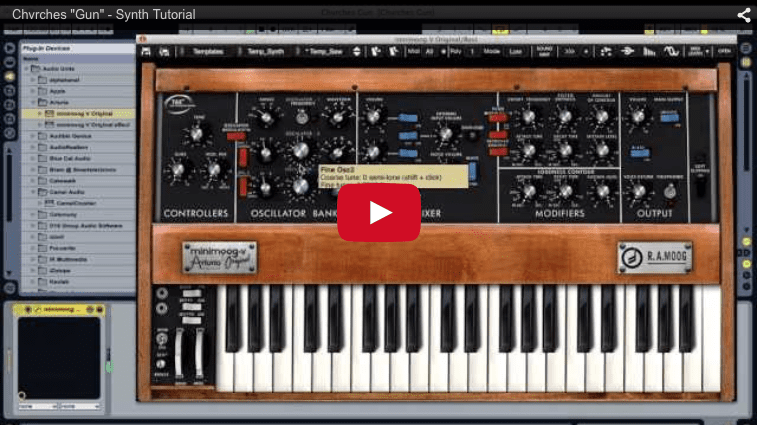
The guys in Chvrches use vintage hardware synths like Moogs, Juno 106, Prophet. So I decided to use emulators of those plugs of those synths. So I’m starting with the Moog and this is the one synth plugin that I’m using that isn’t free. It’s made by Arturia. However, there is a free one for Windows users and you can check that out Mini Moog VA and that’s link at the top of the video. For Mac users, there’s a pretty simple patch actually so you can use any synth to follow along.

So starting with the Moog, we’re gonna reset it, so that it’s just plain old saw wave. We want to use a medium width pulse wave. And we want to bring it down, two octaves. Good. And then we’re gonna bring in the second oscillator, turning it on. This is gonna be one octave above the first. It’s also gonna be a medium width pulse wave.

And we’re gonna turn up just a little bit, it’s just gonna add a little bit of high end. And then we’re gonna de-tune it down a little bit and this is gonna add a little just a touch of movement, a little bit of thickness to the sound. It’s pretty subtle. Just adds a little thickness to the sound but it keeps that nice solid single oscillator, sound as well.

Next, remember to bring our cutoff down to get a bit of a rounder tone. About there. And then we want to use the filter envelope to give it an attack. We want the sound to start bright and immediately get down to this nice round point. So we turn up our contour to determine that tss bright starting point. So it’s not that much brighter. Just a little bit, it’s gonna be another subtle effect.

Now the way envelopes work is they start at this contour and they go down to the sustain level. Sustain level of zero, is the same as your cutoff frequency and that’s what we want. We want to start from this brightness that our contour knob gave us and make its way down to the cutoff frequency. So we turn our sustain all the way down and here’s what it sounds like. Now these are short notes, so it’s not moving from contour to cutoff quick enough. So we’re gonna bring our decay time down to make that happen faster. So without contour. So it gives their sound a nice shape.

And lastly, we don’t want the note to cut off so abruptly when we let go of the key. It definitely cuts off quickly but when it’s this abrupt, it sort of sounds unnatural. So we’re gonna increase it just a little bit. Now on the Moog, the decay stage of your amp envelope also determines your release stage. So we just turn up the decay time. It’s a little subtler. But it gives it a more natural sound. It also kind of fattens that sound up a bit, cause when you cut it off, you just have that short distinct note.

When you have a little bit of a tail, it just sort of gives the impression of more sound. it’s kind of a nice little trick. So that’s your basic synth sound. It’s a real simple typical bass patch but it’s kind of puny. so we’re gonna add some overdrive. Some tube distortion.

So we’re gonna go to TAL plug-in here, grab the TAL tube effect. By default, you don’t hear much. So we want to do is increase the input, we want to send more of our signal, more of our synth into this thing. So we’re driving the the tubes harder, getting more of that rich warmth out of them.

And then the distortion itself, we want that to be as nasty as we can make it so we’re turning the drive up all the way. And that gave us quite a boost in volume so we’ll bring the output down a little bit. And then this gives you the option of a hard distortion you can make it more aggressive and edgy. So we turn that on. We beefed up the synth a little bit, we made it kind of angry. Now we want to make it even fatter.

So we’re gonna bring in a compressor and I’m not gonna use a typical compressor with you know attack release threshold ratio all that stuff. Because all I really want is just a nice fatness from it. I just want to change the sound of it. And I love the Camel Crusher plug-in for that. This also has a distortion, a filter all that. We just want the compressor.

So I’m turning the distortion off. And by default the compressors on, it’s turned up pretty high and fat modes engaged which we want. So that’s off. On. Fat mode off. On. So kind of squashes it, smears it and thickens it. We’re gonna back it off a little bit though. So we have a nice fat angry bass and we just want to add a little bit of low end.

So I’m just going to bring in Ableton’s EQ. You can use any EQ for this. It’s pretty simple. We just want a shelf, we want a frequency of 155, and I’ll turn up the gain. So it has that nice bottom in, just make sure use a shelf because by default uses a sort of peak but a shelf will just really raise up the whole low-end. And that’s your bass patch. I’ma turn down a little bit so that when we bring in the high end or the lead it doesn’t overpower it.

Next, the lead. For this, we’re gonna use another TAL plugin. TAL plugins are great and almost all of them are donationware. So you can download them for free but if you like them I recommend you know donating to the guy because he does an awesome job of this plugins or buying one of his premium plugins.

Let’s see, so this one is an emulation or it’s inspired by the Juno 60. And the Juno 106, which is a different synth, used by the Chvrches guys and I chose this synth which is similar to that one in its sound. For a particular reason, which I’ll get to in a second.

First things first, we want mono. And we’re gonna turn off this sub wave, we just want a nice single saw wave. Now we want to add a tail to it because the notes cutting off right away. We want the note to ring out after I let go the key so we turn on the amp envelope and we increase our release. Good. And we don’t want any filter envelope, so we’re gonna turn the envelope all the way down for that. And I’m gonna bring the frequency down the cutoff to make the sound a little rounder.

Now if you compare that to the actual sound it’s much rounder. That’s because we’re gonna add a distortion plugin later on, that’s gonna sort of rebrighten it back up. The distortion adds its own brightness. So we make this a little bit round or just sort of create a palette for the distortion.

Now lastly is the chorus, and this is why I chose this synth, in the Juno lines of synths like the 60 and the 106, they had these choruses built into them and they’re kind of a signature aspect of these synths. They’re really simple, they’re just basically on and off buttons. You can’t really tweak anything but they had a very distinct sound. And that’s why I chose this because it sounds like they’re using those choruses.

So we’re actually gonna engage both of them. So it widens it, gives it that sort of subtle instability. Which is really important for this track. Next we’re gonna compress it. Make it nice big and fat. And again we’re gonna use Camel crusher. Turn off distortion. And we’re gonna crank the compression. That made it a lot louder so let’s bring it down.

Now we’re also going to add some distortion and I liked the distortion from the Camel Crusher plugin for this. Problem is, it goes into the distortion and then the compressor. After messing around with it a lot, I found that I wanted the reverse effect. I wanted to compress it first and then distortion.

The reason is because that chorus in the synth, makes a really unstable sound. It makes it kind of louder, softer, louder, softer. The volume fluctuates, it moves around. And when you run that into this really fat hard hitting compressor, the two sort of fight. The compressor fights the chorus and you get that really unstable sound. And it’s kind of a signature aspect of this patch.

So I definitely wanted the compressor right after the synth. So instead of just using the distortion within this instance of the plug-in, I’m gonna bring in another Camel Crusher. And use this distortion. So it goes compressor then distortion. Turn off the compressor. Crank the tube effects. This is like a nice warm distortion. And then to really give it some more nasty edge we’re gonna use the MEK distortion, turn it up halfway. That’s really loud, so let’s turn it down.

Next is delay, go back to our TAL plugins. TAL-DUB III plugin. Now this plugin is cool because it not only is it you know do the regular delay stuff but it sort of emulates old school analog delays that they saturate your sound. So if you drove them hard enough you get that sort of compression as sort of a distortion effect like we have.

Now that’s cool and everything but we already got that through our Camel Crusher plugin. So we’re gonna turn the drive down a bit so we get a nice clean delay. Then we want the delays louder, more of the delay, so we’re gonna turn our wet up. We want it to be synced. The delays for an eighth note.

Now this plugin’s got a cool feature where you can change just the one of the delays, the right or left. You can make it twice as fast, with these times two buttons. So like right now the left delay is an eighth note but the right delay is a sixteenth note. We don’t want that, we already have a nice wide stereo still going in. So we just want one set of delays going down the middle that are just as wide as the synth. So we turn that off.

And then these low-cut, high cut allow you to sort of shape the delay sound with filters but we don’t want that either, we want no high cut, no low cut. So we turn the little cut down, high cut up and now we get the full sound being delayed. And then we’ll lower the feedback just to make it a little shorter.

Last we’re gonna add some ambience or sorry some reverb. I’m using this free ambience plug-in. You can use any reverb plug and it’s pretty pretty simple. Number one, our dry gain’s at zero right now. So all we’re gonna hear is the reverb sound. But we don’t want that. So now we have our dry. And then it our wet’s too high. We just want a little, not so obvious. And that’s your sound.

Now there’s one important note I’m gonna show you. That is looking down here at these MIDI notes, each phrase is about eight notes long. I’m gonna play this twice as slowly so you can hear it. Now, since it’s a mono, every time you play a new note it cuts the previous ones off. So you get these two high notes then that gets cut off by these two low notes. High notes cut out by the low notes. But in the actual patch the high notes kind of ring out.

So, I separated them, up here. Pair of high notes, pair of low notes. Pair of high notes, pair of low notes. You have the patch, exactly the same patch on both tracks but now they’re separate. So the high notes ring out while the low notes are playing. Back to this guy. And this allowed me to turn the low down a little bit so that the highs are a little bit more dominant than the lows.

Now you might be wondering why didn’t I just use one synth and make it polyphonic, and the problem is yes if I change it so say six voices, now they’ll all ring out over each other. But since I’m ringing through distortion when those voices stack on top of each other they push the distortion and the compressor really hard. So it’s uneven. If I’m playing a single note it sounds right but if I play multiple notes at once which polyphonic with long releases will do then it pushes the distortion of compression too hard.

So stick with mono voice and just split them into two. You know all together. Thanks for watching. And again if you have any requests, just click the link at the top of this video, go to our tutorials page and sign our mailing lists, and check out the Syntorial demo. Thanks for watching.

Synth Tutorial: James Blake “Retrograde”

In this synth tutorial, watch Joe Hanley, the creator of Syntorial, as he recreates the chorus track from James Blake’s “Retrograde”. You can download the presets and MIDI files from the video. Joe will be working in Logic using the Z3TA+ 2 synth. Among other things, the video will show you how to use pitch envelopes to create a “swarming bees” effect.

VIDEO TRANSCRIPT

Today I’m gonna show you how to recreate the synth patches from James Blake’s “Retrograde.” We’re gonna Z3TA+ 2 to do it. Before we get started, I just wanna quickly mention a piece of software that I made called Syntorial.

Now, Syntorial is video game-like training software that’ll teach you how to program synth patches by ear. I’ve designed it to give you the ability to do what I’m doing in this video, which is take the patches you hear in your head or in other songs, and recreate them, just know how to make them.

We do this by combining video demonstrations with interactive challenges in which you actually program a built-in soft synth, and there’s over 700 patches throughout the whole thing, almost 200 lessons. And we recently just added a special Z3TA+ 2 lesson pack that has 37 videos that go over every inch of Z3TA+ 2. So if you’d like to try it out, there’s a free demo, 22 lessons, just click the link that’s popping up on the video right now, and there’s a special Z3TA+ 2 version of the demo as well, and that’s the link popping up now. And of course, both these links are in the description below the video.

Anyway, let’s get started. So, here’s the beat. So before we get into the synths, the drums are real simple, it’s just an 808 kick clap. I’ll start right here. I used battery, but anything that’s got 808 samples will work. I tweaked it a little bit, I pitched the kick up a bit and I pitched the clap down a bit, but that was just to match his track.

Now let’s get right to the lead, ’cause I’m sure that’s what you’re watching this video for. Now, I’ve had a lot of people write in and request a tutorial on this lead, and a lot of them describe it as polyphonic because they hear multiple notes. But it’s not, it’s monophonic, it’s one voice, he’s only hitting one key and holding it, but it’s got multiple oscillators, and each of those oscillators is having their pitch manipulated from a different amount, which makes it sound like three voices turning into one. So let me show you how it works.

Go up into here, initialize Z3TA+ 2, so now I get no sound. And it’s a saw wave, so we go to oscillator one, we do a saw. Now, they’ve got four saws here, four Vintage saws, I always go with One, it’s got the fullest sound, I like it the most. Now, like I said, it’s three oscillators, so we’re gonna make oscillator two also a saw, oscillator three also a saw. Before I play a note, it’s gonna be kinda loud, so let me turn it down over here. And back up a little bit, let’s go over to about there.

Now, it still sounds just like one oscillator. But I’m gonna de-tune the first one up a bit, and you’re gonna hear it start to thicken and start to kinda move a little bit. And then I’m gonna take the third oscillator and pitch that down about the same amount. This is a very, very, very old trick, when you take the same exact waveforms and de-tune them from each other you get a nice thick, moving sound.

So we’ve got our three oscillators, three saws, slightly de-tuned to give us this nice, moving, thick sound. Now we wanna take an envelope and apply it to each oscillator, and we’re gonna use that to bend its pitch. So I’m gonna take oscillator two and disable it, as well as three, so we can just hear one for now. It’s gonna be easier to understand how these envelopes work when we’re just looking at one.

Mod matrix, here’s where we set up all of our modulation routings. So we want envelope one, we’re gonna route it to oscillator one’s pitch. Now, almost always when I am modulating pitch in Z3TA, I always go into curve and select one of these pitch curves. This simply just allows us to set amounts according to pitch amounts, so octaves, whole tones, semitones, it helps us pick out specific notes in our modulation a little bit easier.

I’m gonna set it to one octave, and I’m gonna max out the range. So now we can use the envelope to go to as much as one octave now. So I’m gonna go over to envelope one. And right now, we’re not gonna hear anything. No pitch movement. This envelope amount is at zero, that’s why nothing’s happening. I’m gonna hold down a note, and as I raise it, you’re gonna hear the note go up, and we wanna raise until we get to where we want that note to start. ‘Cause when he first hits that key, you hear one of the oscillators start higher and then move its way down.

So I’m gonna hold down until we get to that pitch. There we go. Now, our envelope is currently at the top, it just holds the note up here. That’s ’cause our sustain level is maxed out. I’m gonna take it all the way down, and now our note’s gonna start here and make its way down.

That’s a little fast, so we’re gonna increase our sustain time. This is a little confusing, most of you would think of this as decay, which is pretty much what it is, but Z3TA calls it sustain time, but you can think of this as decay, and this is sustain. Now that’s a better length, but if you notice, at the very end it shoots down really fast. But in “Retrograde” it really slows down near the end and it kinda almost sounds out of tune for a bit, it’s what creates all that tension.

So we wanna slow it down at the end by changing the curve right here. See, now you see it goes down kinda fast, but then it slows here, so now we get this. You hear how it hangs out at the end for a while? Now, overall it’s a little too fast, so we’re gonna bump it up to about here. And there you go, that’s oscillator one. I’ll turn that one off.

Oscillator two, we want it to do the same thing, but we want it to come from below and bend up. So we’re gonna give it its own envelope, envelope two, with similar settings here, one octave, but this one’s going to oscillator two’s pitch. And we want the envelopes to be almost the same, and what you can do with Z3TA is right-click, copy, then right-click, paste, and now two and one are the same.

But we wanna set a negative envelope amount, ’cause what this’ll do is, instead of shooting the pitch up and then gradually coming down, it’s gonna shoot the pitch down and gradually come up. Even though it looks visually like it’s going up and then back down, when we set it to a negative amount it does the opposite of what you see. So now we get this. If I went above: But I am going below.

Now, the third oscillator’s also gonna come from below, just it’s not gonna start as low as the second oscillator. So, envelope three, maxed, pitch one octave, and oscillator three pitch. And we’re gonna copy and paste the envelope, and we want a negative amount, just not quite as much, so let’s bring it up to about here. And our third one is like this. Bringing the second in. Bring the first back in. And that’s how you get that swarming bees, bending pitch effect.

Now, we’re not done yet, it’s way too bright right now, we’re gonna need to filter it. So we’re gonna route all three oscillators to filter one, just like that. And we’re gonna do a low-pass filter. Now, that’s way too dark. What the sound actually does is it starts kinda dark, and as those pitches are bending in, it brightens up a little bit. So we’re gonna set our cutoff to the darkest point, how it starts, which is about here.

And then we’re gonna use another envelope to brighten the cutoff, to raise it up, in that beginning part of the note, so envelope four, max this out, route it to filter one cutoff. And then, just like we raised this amount to find the highest pitch with the oscillators, we’re gonna raise this amount to find the brightest cutoff that we want. And it’s not much. It’s about there. And now we use the attack to take us from cutoff to envelope amount. About 1.6 seconds. There.

Now, the sound is a little flat, it’s not cutting forward as much as I’d like, so we’re gonna use a heavy amount of resonance, and listen to what it does. About there. It makes it a little more aggressive, makes it push forward and kinda cut. This is great for leads and basses. Or for anything really, resonance can really make a patch go from flat, and it can make it come alive just by pushing it out a little bit.

And then if you listen carefully, the sound kinda fades in a little bit, it doesn’t come in strong. So we’ll go over to our amp envelope, and just increase our amp attack. And that’ll kinda ease in right there.

Now one last thing. Every once in a while, you hear one of the oscillators bend down a whole step and come back up, it’s like , it does that every once in a while. So he triggers it whenever he wants, and so you’d wanna use some kind of mod control with your hands, so maybe the pitch wheel or the mod wheel. But for this, I particularly like to use aftertouch.

Now, for those of you who don’t know, aftertouch pretty much comes standard on most synths and MIDI controllers now, and usually when you play a note you just hold the key down. But when a keyboard has aftertouch, you can push it even further, you have to give it a little more strength, and that further push, going deeper into the key, can trigger a modulation. You’ll find it in this control column, channel aftertouch. And we want to modulate oscillator two’s pitch. Now, with Z3TA+2, when you wanna use one of these controllers, you have to set source to On to enable this row. And this is gonna determine just how far down that pitch is gonna go, I’ll come back to this amount in a second.

Now, right now by default, when I push this key down further, it would raise the pitch. But we don’t wanna do that, we want it to lower it. So to reverse this sort of natural, positive modulation, we go into linear, and we go to unipolar linear minus. Sounds fancy, but really it just reverses the direction. Now if I press the key further down, it’s gonna bend oscillator two’s pitch down, listen. And let me disable these for a second, okay. That’s normal press, now if I press further in: That’s what it did. And I can press slowly in and then slowly out to do kind of slow bend.

I particularly like it for this track because it sounds like it’s struggling, and if you have to physically push into your keyboard, you kinda get that struggle feel into the sound. And by the way, the range will just determine how far down that pitch will bend when I push in the aftertouch. I just set it by ear, just tweaked it until it sounded about right. So now we’ve got that set up, let’s bring these guys in, and now we’ve got our patch.

Now here comes the aftertouch, right here. So I pushed in, then I slowly eased off the key. And here comes some more right here. I pushed in to bend it down, and then slowly let it up. Next we’ll do the bass and the sorta organ synth.

By the way, you can download these patches for Z3TA+2 and the MIDI file, so you can see what notes I’m playing just by clicking the link that’s popping up on your screen now. It’ll take you to a special page with this video on Syntorial’s site, and there’s a link underneath that you can click and download. And by the way, we’ve got a lot more of these tutorials and articles, free stuff on Syntorial’s site. When you go to that page, you’ll see a newsletter signup on the right side, just give us your email and we’ll send you a link to a page full of this stuff.

So let’s do the bass next. Solo it for a second. So just a super round, subby bass that’s kind of moving and swirling. Let’s open her up. Fairly simple patch. Also let’s initialize. And this is a saw, and at first I thought it was just a simple sub-bass, that’s what I programmed first. It’s kinda loud down in this range, so let me bring our master volume down a little bit. So there’s our saw.

Now obviously, to get that round, subby sound, we use a low pass filter. So we’re gonna route this to filter one, and 24 dB, low pass, and we’re gonna turn it pretty far down, in this case it’s gonna go all the way down to 175, right there. Now, if you really wanna make these… Just give these sub-basses some oomph, you can use resonance, and I’m gonna turn it up fairly high. Yeah.

Resonance will just push out part of your sound. If you have the cutoff set right, it’ll push out just the right part, and it really made this sub-bass still sound nice and round and heavy, but it kinda pulled it out and pushed it, stopped it from being flat, just like it sorta unflattened the lead as well. Just makes it step forward in the mix a little bit.

So this is what I originally programmed, but if you listen to the track, you hear the volume kinda fluctuate, and you hear the bass sort of moving around. So I did a doubling and de-tuning. I’m gonna copy, paste this, and we’re gonna de-tune them. We’re gonna do 16 up, 16 down, let’s actually listen to it as I do it. There we go. Yeah.

Now, keep in mind, these are synced right now, and that’s really important. When you double and de-tune sounds… Sorry, when you double and detune oscillators, you’ll get a little point on the beginning of each sound, it gives it a natural attack transient.

Now, some synths, if you’re doing this on a different synth, particularly analog synths or analog-modeled synths, they don’t have that. But with these digital synths, you can sync them, and that’ll give you a point on double and de-tuned sounds. That’s what gives this bass a on the beginning of each note. That is important.

For example, if I switch to free, it unsyncs them, and listen to it. The beginning of each note. Some have a point, some don’t, it’s very inconsistent. So this sync is very important. If you have this sort of option on whatever synth you’re using, make sure it’s on for this bass. So there’s our bass. Let’s bring other things back in. It’s a huge sound.

Lastly, we have this organ-like synth really filling out the middle. And that sounds like this. So initialize. This is gonna use a combination of saw and medium pulse wave. But since we’re playing a bunch of notes, I need to compensate by turning our volume down here, otherwise it’s very loud. So saw, oscillator one. Oscillator two, we’re gonna go to a square wave, and we’re gonna use this control right here to narrow the pulse width.

Now here’s our combined sound. Now, we wanna add some movement, thicken it up a little bit, ’cause an organ-like tone has that. So we’ll double and de-tune them. Not a lot, but a little bit. Now, there’s this attack on the sound that’s kinda crisp, like every time we hit a note. In this case, we don’t really want that, this is meant to just fill out the middle of our track, we don’t want that point sticking out.

So, like I mentioned with the bass, when it’s synced, when you’ve got double and de-tuned oscillators and you sync them, you get that point. So we’re gonna take that off, and let’s see if that helps. It helped a little bit, but we’re playing a bunch of notes of a very, very bright patch, so we’re still gonna get that crisp attack.

So we’re gonna use an amp attack and just cut off the very beginning of the sound with a very, very quick amp attack, 0.04 seconds. So you won’t actually even hear a swelling up of volume, it’ll just cut off that front end. There we go. Lastly, we wanna throw on a flanger. So I’m gonna go down to, let’s see, mono flanger, and here’s what we have by default. So it’s not moving, the default speed’s very slow, so we’re gonna increase the speed so you start to hear the flanging move up and down.

And then feedback we can use to really accentuate the flanger sound. Next we want this flanger to go deeper down. If we increase our delay, it’ll kinda reach a deeper point, listen. Very nice, and then lastly, our depth we can use to bring that high end down. Depth also can kinda bring the low end up a bit, it’s kinda like LFO amount if you’re familiar with LFOs.

And to be honest with you, depth and delay I had to experiment a lot with, it’s not always obvious what they’re doing. But you can just think of them as a way of controlling the highest and lowest point of that flanger, and that’ll help you kinda figure out how to set them.

Now, this is way too wet, there’s way too much flanging on this, so we’re gonna bring our level down. It’s a subtle flanger. Interesting thing about this patch, if you listen, it sounds like there’s two layers, it sounds like there’s almost a round body and a bright, sizzly top. So much so that I actually spent most of my time trying to make this patch with two patches, one for the bottom, one for the top. And I succeeded, and then as I was making this video, I realized this might just be a wide open patch with no filter. And it was, much simpler than I thought it was. So one thing to keep in mind is always try the simplest solution first, or you can waste a lot of time trying to do something unnecessarily complex.

So, altogether, we got… Oh, let’s take that loop off. Before we play the whole thing, I copied this first one, pasted it, so this is the exact same bending lead, and then I have it come in later. ‘Cause if you hear, when the chorus starts over, ’cause he repeats it a few times in a row, you hear that bend lead come in again, but the first one’s still being held, so that’s what happens right here, take a listen.

And that’s it. Again, you can download the patches for Z3TA+ 2 and the MIDI file so you can figure out what notes are playing. Check out Syntorial, 22 lessons free with the demo, all the links are in the description, and thanks for watching.

Synth Tutorial: Calvin Harris “Let’s Go”

In this synth tutorial, watch Joe Hanley, creator of Syntorial, as he re-creates Calvin Harris’ “Let’s Go”, using Ableton Live and various free plugins. You can also download the midi files, synth presets, audio files, session files, and everything else you’ll need to follow along at home. Plugins used:

VIDEO TRANSCRIPT

Welcome! Today we are going to be remaking the beat from “Let’s Go” by Calvin Harris. We’re going to be using all free plugins and effects when it comes to the synths. So, you can download and follow along exactly.

Uh, we have made all the presets, audio files and MIDI files available for you to download. Just click the link at the top of the video. It’ll take you to the Syntorial kickstarter page. Scroll down to the bottom and you’ll see a bunch of tutorials here. Videos, each video will have link above it.

So, find your video, click the link and what you will get is a bounce of the audio, a file with the links to all the plugins to download, Ableton and Reason sessions. For the Ableton users all you’ll need is those free plugins and it’ll be ready to go. And then for those of you who do not have either Ableton or Reason, we’ve got all the MIDI files and the presets for each track as well as the drum audio.

So, you can just bring it all in to whatever software you use and set up the beat there. While you’re at this page, check out Syntorial. It is the ultimate synthesizer tutorial. “Fully interactive training software that’ll turn you into a synth programming guru.” Let’s get started.

Starting with the drums. Right now these tracks for the drums only are audio. I originally made them in Reason. So if you want to get the MIDI, if you want to rebuild with your own samples or just to see exactly what the rhythms are, you can download them with the link at the top of the video.

Breaking it down we’ve got, kick, clap. Clap’s being sent to medium hall reverb. There it is without it. There it is with it. I just put the medium hall on “no return” and then you can send whatever tracks you want to it, which includes the clap. Hi-hat. Tambourine. And at the end of this loop, you got this big crack sound. That is drenched in reverb. Maxed out. And that’s the drums.

Next is the Big Synth from the chorus. We’re going to be using synth one, which is a VST. For those of you who need an audio unit, for garage band or logic, we have presets available for Automat, which is a great free audio unit synth, but for the video, we are using synth one.

Now to start, we need to load an initialized patch that I made, which kind of sets all the values to zero because by default synth one loads one of its patches. And before I push play, I’m going to turn this down because it’s really loud. A little bit up. Okay.

First, we want to switch over to a saw wave, and then we’re going to detune it. This basically doubles that wave form and detunes one of them, so you get this big swirly effect. Next, we’re going to add a sub oscillator, one octave below. We want saw wave. That really adds body to the sound.

We add one more oscillator, as a triangle wave. Here’s what it sounds like by itself. It’s kind of bell-ish. We obviously don’t want that much. We want that much. Next, we want to add some attack using the amp envelope. We keep the decay short, which it already is. I’ll show you what it does.

We bring down the sustain. It adds a kind of abrupt attack to it. We don’t need that much, we want that much. Then to add a tail to it, we increase the release. About here. Then we want to take just a little bit of the highs off. Not too much. So we switch to a low-pass 12dB. And bring the cutoff down to about here. Just a very subtle cutting off of the highs.

Next, to make it even bigger and swirly, we add unison. We want three voices per note. Now, when you do this you have to make sure you have enough voices available because basically, the three voice unison is tripling every note you play and then de-tuning each one. So, if your voice count was way too low, just to show you. See, you’re losing tons of notes.

So, we need to increase ours to the point where we can get all of these notes in. Twenty seems to do the trick. Next, we want to spread our sound and now its covering the whole stereo field. Nice and big. Next we want to detune it more. So, each of these voices detune slightly from the other.

But, we want to do it even more. This kind of makes it more intense. If I really did it, it really starts to get out of tune, so we don’t want to go so far it gets out of tune, but you want to go far enough that you get the kind of intensity you’re looking for. Last, we want to add delay.

We’re going to spread the delays from each other a little more, so you hear that in the left and right channel. You want to increase the number of delays and decrease the feedback. And we don’t want it to be so loud, the delay, so, we bring it down to about there and that’s your sound.

There’s also a bit of reverb on it. I’ll show you what that sounds like. This kind of adds some space around it by increasing it. Its kind of subtle because the delay’s already kind of giving a lot of space, but this just gives it more. And that’s the Big Synth. Now, we have the Synth Bass. This is a real simple synth bass sound. We’re going to be using Tal NoiseMaker, a great free VST/ audio unit synth.

First, I’m going to turn it down a little bit. Oops, too much. About there. Now if I turn the sub oscillator off, all you hear is the main oscillator, which is a saw wave. The sub oscillator is one octave below that and it’s a square wave. That’s where that nice low end is. So, there’s your full waveform sound. Next, we want to add a little bit of tail. Not too much, just a little bit. This prevents it from sounding too abrupt, but also helps it fill up the space.

If there’s some kind of notes trailing off between each note it kind of just fills that low end, which is what this track calls for. Now, we want to set the lowest point of the sound, the roundest part of the sound to here. .43 But we don’t want to start this low and round, we actually want to start bright and work its way down to that.

So, we set the contour to the point where we have to start, and then increase the decay and lower the sustain. So, we bring the sustain down to where the cutoff is, because this where we want the envelope to go and bring the decay up to there.

So, now it starts at the contour and it quickly makes its way down to the cut off. Now, just to make sure that notes that are released early do the same as the decay, we set the release to match decay. So then no matter how you play this patch, really short notes or longer notes, its going to go, the filter’s going to go down from the contour point down to the cutoff point the same way no matter what.

When you use a filter envelope and apply it at this speed, at a really quick decay, instead of hearing the sloping down of the cut off, you’re going to instead almost kind of hear just like a bright attack on the front of the bass sound. That’s kind of what we’re going for. It helps it poke through the mix.

So, with all of the other stuff, Last, there’s kind of a bit of a pitch bend in this. So, we set this all the way so it bends at a full octave and then you can hear it. A at the end of that line. Next, is what I call the Big Noise.

In this track, there’s this sort of noise in the background. This white noise. It’s all over, in the left and right, it’s moving around, and it’s cool because it just fills this sound. It makes it sound like it’s just that more active and big. So, what I’m going to do here, is show you how to make that with a synth. Now right now, Tal NoiseMaker, I’m going to turn it down before I get this going.

Okay, right there. So, now it’s an actual wave form. No sub oscillator and we want to switch this wave form from saw to noise. There you go. Now, that’s the simple sound itself. Now we just need it to sort of drift off. There we go. And we want to get rid of some of the lowness in there because it will fill too much space and make things messy. So, we put on a high pass. In this case, I went with a 24dB high pass.

We obviously don’t want to cut everything out because that would make it nothing. Uh, let’s see here. How low do I want to go? I’ll put it down to about here. And that’s your white noise. It’s the same rhythm as the Big Synth. Hitting at the same time. Next, we want it to be really wide so, we’re going to use a delay widening trick. This is Tal-Dub delay.

Now, right now you can here like, the delays and the tail of it. We don’t want that. Instead, I’m going to show you how to use this just to make the sound wide. So, first things first. Make it wet. A hundred percent wet. We don’t want any damping, we don’t want any resonance.

So, now you really hear those delays. We want to get rid of that. Instead, we’re going to make this manual instead of synced. We’re going to make one channel zero.

So, it’s basically just the noise going through, nothing happening to it. The right one, you want to set, as far as you can without hearing the two separate delays. If you go too small, we don’t want that too far to hear them separate so, we’ll go to about here. Feedback now. This is where it gets tricky. Too low, and you don’t get anything. It gets quieter and quieter and quieter. Too much, whoa, we get a little feedback.

We’ll set it to about here. There you go. Wide noise. Off, it’s in the center, on, and it’s wide. Now last, we want to give it some reverb, so lets turn everything on again. Kind of subtle. Here we go. Here we go. It’s very subtle now. Off. On. I’m going to turn it up so you can really hear it. We don’t want it. It’s more of just a subtle fill in the background. That’s the Big Noise.

All right, last there’s this Bending Noise sound on the fourth beat of every measure. Uh, it could be a sample, but I’m going to show you how to make it from scratch with a synth, a filter, and a flanger. So, start with NoiseMaker and we’re going to turn this down considerably. It’s made with noise, so no sub oscillator and switch this to noise. Very good.

We’re going to add a little bit of attack to it now. I’m gonna to show you how to do that. Bring the sustain down about halfway. Then bring the decay up. So, I don’t know if you could hear that little TSK at the front of it. If I bring the sustain down you can really hear it.

So, it has a little attack on the front of it. We don’t want that much, we just want this much. Now, we’re going to take off some of the highs and lows with the band pass, set it up to about halfway point, good that shapes it. Resonance will shape it even more, give it some kind of mids, make it bite a little bit more. There it is. It makes it kind of cut through. We want to cut off some more lows, just a little bit more subtle cutting to help it really bite through the mix.

So, another high pass and set the high pass to about here. Yeah, it gives it just a little bit of more of edge. And then the flanger is what makes it swirl and bend. This is a stereo flanger. All we need is mono though so it stays in the center. So we send the spread to zero, the gain to zero so it doesn’t make it quieter or louder.

The delay is the most effective part. Right now, if we reduce it, we get less to the grainy metallic-ness and we get more swirl and sweep. Yeah, there we go. Depth, we want it to go really high and really low, so it’s an extreme flanger. So, we bring that depth up. There we go.

And then lastly, we slow it down just a tiny bit. And that, is your Bending Noise. Now, with everything else in. Now, turn it up for a second. I’m going to give it some reverb. Helps it sit in the mix a little bit. I’ll be turning it back down. And that’s the Bending Noise.

Thanks for watchin’! Click the link at the top of the video to download all the stuff you need to make this at home, and check out Syntorial while you’re there.

Synth Tutorial: deadmau5 “Phantoms Can’t Hang”

In this synth tutorial, watch Joe Hanley, the creator of Syntorial, as he recreates the synth lead from “Phantoms Can’t Hang”. Video includes valuable info on layering synth patches, and using sound design to build a track. Don’t forget to download the presets and MIDI files. Plugins and software used:

VIDEO TRANSCRIPT

All right, today we’re gonna go over the synth lead from Deadmau5 Phantoms Can’t Hang. And this is an interesting lead, because it goes throughout most of the track, but it changes, it actually goes through four different stages. The notes stay the same, but the sound itself changes in layers, it’s a really interesting thing.

Before we get started, I just want to quickly tell you about Syntorial. Syntorial is a video game-like training software, that teaches you how to program synth patches by ear. I designed this specifically to give you the ability to do what I’m doing in this video. Take a song you hear in your head, or on another track, and recreate it.

It does this by combining video demonstrations with interactive challenges, in which you program over 700 patches on a built-in soft synth. And you can try it for free the first 22 lessons with our free demo, just click the link that’s popping up on the screen now.

Now Phantoms Can’t Hang. So as I mentioned before the lead goes through four different stages. So we’ll start here. Starts with this sound. It repeats this for a while, and it eventually gets replaced by a more aggressive version. This repeats, and then they add a layer an octave higher. And then they bring in the trance lead.

So we’re gonna start with that first lead over here. This guy. Now. We’re gonna use Synth 1 for this. Synth 1 is a free synth, that you can download the link that’s popping up on your screen now. And it’s available as a VST for Mac and PC, and they just released an audio unit version for you logic users. So just click the link on the screen and you can download it there.

And our first step is initializing it. Now I’ve created this initialized patch. And you can download this patch now, with all these other patches and the MIDI files for this from the link that’s popping up in your screen now. It’s gonna take you to a page with this video and the download link. And when you’re there, you can subscribe to our newsletter and we’ll send you to a new page that’s got this tutorial, along with a bunch of other video tutorials, interactive stuff, all sorts of synth goodies there. So sign up for the newsletter while you’re there.

So we’ve got our initialized sound. It’s a little loud, so I’ll turn it down for now. And you probably hear some reverb. I have a reverb set up as a send effect over here. So that way I can take all these leads, and send them to that reverb. I’m gonna turn it off right now. I’ll come back to that reverb in a second. So now here’s our true raw sound.

First things first, we want a different wave form. We do want the pulse wave, but we want it to be full square width. And then, this sound starts bright when you hit a note, and goes dark by the end of the note. So we’re gonna use a filter envelope to do that.

First, we set our cutoff to the darkest point, the end of the note which is. About. There. But, we want it to start bright. So we use our filter envelope amount. That determines the beginning of our sound, the brightest point. And our sustain, if we turn it all the way down, the filter envelope will take us all the way down to our cutoff. Zero sustain is our cutoff.

So now, if we take this to zero, our sound starts at this filter envelope amount and goes down to our cutoff like this. And we want that downward motion to be quicker, because we want it to really be a nice quick pluck sound. So we’re gonna make the decay faster. So now we’ve created that pluck transient. I’m just gonna turn it up, because lowering the cutoff makes it quite quieter. Let’s go to about there. There we go.

Now, one interesting thing about the actual patch on the Deadmau5 track is the higher notes. These up here, are brighter than these lower notes. Now by default, a low pass filter, it does the opposite. It makes lower notes brighter, higher notes darker. And we can use key tracking to reverse that effect. But in this case, not only we’re going to reverse it to even it out, we’re gonna take it even further, and make the higher notes brighter, the lower notes darker. So I’m gonna crank key tracking. And now our highest note, Is gonna be brighter than our lowest note.

Now unfortunately, this brightened everything. It made our higher notes brighter than our lower ones, but it brightened everything including our lower notes. So we need to compensate for that by bringing the frequency down, the cutoff down. Now, we have, What we’re going for. So before, we had this. The bottom notes sound great, but the high notes aren’t bright enough. Turn this up, bring this down. Now. Just those higher notes got brighter.

And then, we’re gonna add a little resonance, to give it a little bit of point. Pull that sound out, kind of push it out a little bit. Adding a little bit of resonance is a great way to sort of un-flatten a sound. Kind of, make it more present, bring it forward in the mix.

And then, we just wanna cut the note off a little shorter, it’s ringing out just a little too much. So we’re gonna bring our amps to stand all the way down. Now, that’s too much. So I’m gonna elongate the decay. There we go. Now, before it was this. Now it’s. Just took a little bit of that end off. This is a mono patch. And then, we want to spread it. So we turn on unison, and we crank the spread.

Now, like in Deadmau5’s track, the sound kind of moves left and right very subtly, and we’ve got that going on with the spread unison. But, it’s happening kinda fast. That’s a little manic-sounding. So we’re gonna slow it down by reducing the detune amount. Perfect.

Now, we want to bring that reverb back in. So I’m gonna increase this send. I’m gonna overdo it, so you can really hear the reverb for a second. Now, the reverb I’m using is something called ambience. It’s another free plugin, and I’m gonna delete it, and then bring in a new one, so I can design it from scratch. And all I did was one little change. Here it is by default. It’s too short. So I just increase the time. And then, we don’t want it so wet. There we go. So it’s a long reverb, but it’s not really, really wet. It’s just kind of in the distance. Our sound should still be nice and dry up front with this sort of long reverb tail in the background.

Next, we have the little bit more aggressive lead. We’ll come back to that. And let’s initialize it. Here’s our raw sound. Turn it up a little bit, for now. And this one, we’re gonna use a pulse wave too, but we’re not gonna go full square. This too, we want to have brighter notes up high, darker notes down low.

So we’re gonna crank the key tracking ahead of time. And we also want this to start bright, using a filter envelope and get darker. But, we want it to get so dark, that we can’t even hear it. So we wanna use the filter envelope, kinda like an amp envelope as well, we’re gonna use it to cut the sound off. So we’re gonna start at about. This brightness. And if you wanna go all the way down to cutoff, we gotta turn off sustain to zero.
There we go. And by the way, we have reverb on this as well, you can hear it in the background. We have reverb on all of these leads. And it’s the same reverb we’re using for all four leads.

And then, we want this to be a little bit longer, give it a little bit more body. It’s subtle. But, it’s there. Make the release the same as the decay. Just gives it a little bit more length. Now, it sounds nothing like it right now. So we’re gonna use filter saturation, which is basically kind of like overdrive. If you push this filter hard enough, it starts to overdrive, distort it in a nice warm way. So listen. That’s where we get our distortion.

Now, he may use an actual distortion plugin overdrive, but when you can overdrive the filter within the synth, it’s nice, it’s usually a nice, warm overdrive effect.

Again we get a mono patch here, just one note at a time. And we’re gonna use unison like we did the last time to spread it. So unison stick with two voices, crank the spread. And then, we’re gonna increase our de-tune just to thicken it a little bit. Usually, the more de-tuned you make a patch, the more thick of an effect you get. We don’t need a lot more.

We don’t wanna overdo it. But, I’m gonna increase it just a little bit. It’s subtle, but it gives it a little bit more action, a little bit of pulsating, a little bit of thickness. And then, I’m gonna bring the volume down. Actually, I’m gonna bring it up. There it is. We’ve already got the reverb on there.

Now, the last difference is the patch in the tracks got a little more oomph, it’s got a little bit more, sort of low mids going on. So I’m gonna bring in an EQ, and you can use any EQ for this. And I’m gonna boost 450. So listen to the difference with and without. With. Without. Just gives it a little bit more of an ooh ooh.

And then, I’m gonna cut off the very bottom. This can sometimes tighten up your sound, and it’s great for mixing. If you get rid of that bottom end that you don’t need, it kind of clears up the mix a little bit. So we’re gonna make it a shelf. Gonna take it all the way down. And there. And then increase this guy so that we just wanna cut, kind of abruptly as you can see. But, we just got to cut this bottom chunk off.

But, we don’t want to affect this bump that we added here. So we give it some oomph and we tighten it up a bit, at the same time. So there’s that sound.

Now, the next sound is actually the same sound, but an octave higher. So all I’m gonna do is, I’m just gonna copy this synth. Move it there. This midi right here, is just the same as this, but it’s an octave higher. So what we get is. That. And then, when you put the two together. Now, there are a couple differences.

For this higher one, we wanna reduce the volume, we don’t want it to be so loud. It’s gotta be the layer, and not the main sound. The lower one’s our main sound. Good. We want it to ring out a little bit longer than the lower one. This is a great trick, if you want a sound that’s quieter, to be more heard, without cranking it up, you just increase its tail. Increase its length, and it’ll ring out just a little bit longer than the other.

So I’m gonna increase the filter decay and release just a little bit. So now, it’s still quieter, but we can hear it much better just by giving it a longer tail. And then, we’re gonna EQ it too. ‘Cause right now, when it comes in, not only do you hear that high end, but it changes the lower patch, listen. It’s harder to hear that lower patch by itself, they’ve kind of blended together.

Now, if that’s what you were going for, this would be perfect. But, we’re not going for that. We want this higher one to be smaller and separate. So I’m gonna cut off a big chunk of the bottom end, using a shelf, turn it down, and let’s go all the way to. About. Here. And fix it. It’s kind of steep. And now, without the high lead. When I bring it in, it’s not gonna change the lower patch. It keeps it more separate. Without EQ. Listen to what happens to the lower patch when I turn the EQ off. Here it is on. See how it changes the character? So in this case, we’re using EQ to separate these two patches, so they sound more distinctly different from each other.

And then lastly, we bring in our trance lead. This one’s gonna have EQ on it too, we’ll delete it for now. Synth one, initialize. Lets bring it up a little bit. This one’s gonna be saw. And then, to get that nice, thick, detuned sound, we use our de-tune right here, and this will double this, oscillator and detune it. Nice, thick and washy.

But, we want the tail, when we let go of the key, to be shorter. We want it to be a little bit more abrupt. So we’re gonna turn our amp release down. And I wanna bring out that top sizzle a little bit more. Since our cutoff’s already at the top resonance, we’ll do that. I wanna bring that sizzle slightly down, so it’s a little less white-noisy, a little more sort of edgy. And then, we’re gonna add some of this saturation, this filter drive, to give it a little bit more aggression. It’s a mono patch. And then, we’re gonna use unison to not only spread it, but to thicken it a little bit. So we’re gonna turn it on, and go for three voices. And add a little bit of thickness by cranking the detune.

This is kind of the background layer, so we’re gonna bring the volume down. Reverbs on it, let’s hear it all together. Now, I’m gonna turn off the high one, so we can just hear the main lead and this trance lead. When the trance lead’s added, we lose some of the body of the main lead, listen. Suddenly, that main lead, you just hear more of the clipping of it, the attacking of it. The sort of, edge of it. But, you don’t hear that ooh, body of it. So that means something from this trance lead’s masking that main lead.

Now, if you remember with this main lead, we boosted 450. So we’re gonna go into the trance, and we’re gonna cut 450. We’re gonna remove that, that chunk of body from this trance lead, and that’ll allow us to hear the main lead’s body much better. So that was 450. And we’re gonna cut it. When you cut, you always want to narrow it a little bit.

So listen to the main lead not the trance lead when I turn this EQ on and off. On. It’s subtle, but that main lead suddenly gets a little bit thinner, a little bit lighter. It loses some of the body when this EQ is off. So again, we’re using EQ to separate the two sounds.

In this case, these three layers need to be distinctly separate. So we use EQ to cut different aspects of them out, so they all play well together. It’s basically a mixing technique that we’re using in the sound design capacity. And that’s it. Thanks for watching.

Synth Tutorial: Ellie Goulding’s “Lights”

In this synth tutorial, Joe Hanley, maker of Syntorial, will re-create Ellie Goulding’s “Lights”, in Ableton Live. Don’t forget, you can download the midi files, synth presets, audio files, session files, and everything else you’ll need to follow along at home. Plugins used:

VIDEO TRANSCRIPT:

Welcome. Today we’re gonna be remaking the beat from. Ellie Goulding’s “lights”. I’m using free plugins when it comes to the synths and it’s effects, so regardless of the software that you use, you can follow along exactly.

To download the presets, MIDI files and audio files, just click the link at the top of this video. It will take you to the Syntorial Kickstarter page and scroll down to the bottom. tutorial section, each video will have a download link.

When you download, you will get bounce of the audio, a file with links to all the free plugins, everything you need to remake each track including the MIDI files and AU or VST presets and if
you use Ableton or Reason, the full sessions. For Ableton, all you’ll need is those free plugins and everything will be ready to go once you open it.

While you’re at that page, check out Syntorial.It’s the ultimate synthesizer tutorial – a fully interactive training software that will turn you into a synth programming guru. Let’s get started.

Alright, starting with the drums. Now these drums were originally made in Reason and then the audio is bounced and brought into Ableton, so you got your kick audio snare audio, hi-hat audio, etcetera. Included in the downloads are all these audio files as well as the original MIDI from reason so you can either just bring these audio files in the way I did here or you can bring the MIDI file in, get a closer look at the way the rhythms are and then rebuild the drums using your own samples, it’s up to you.

Breaking down the drums we got: a kick, snare, snare, hi-hat, shaker, floor tom, and then a mid tom fill coming up here at the end. And then, two cymbals. It’s the same crash sample, just on different sides, so it starts on the left coming up about halfway in here you hear it again on the right. That’s the drums!

So now we have the bouncy synth, the thing that you hear at the very beginning of the song. The MIDI’s already recorded and you can of course download that, to see what notes are
being played and what rhythm. I like to have the MIDI recorded and playing as I program, otherwise you have to play the keyboard with one hand, program with the other and this is much easier. So we’re gonna solo this.

Synth we’re using is TAL Noize m4k3r, nice free synth VS/AU, Mac/PC. So this is the default sound, which is nowhere near what we need. First we need multiple notes, poly. No sub-oscillator.
And the shape, it’s like a mallet, a short note so we’re gonna bring the sustain all the way down cause that’s where we want the sound to go as we play, we want to fade to zero and we want that to happen pretty quickly. So we bring the decay to about… here.

That gives us a short note and then when you want a mallet-like sound, you want it to react the same no matter whether you hold the key down or release it, so you make the release and the decay equal and now it responds the same no matter how you play.
Um, also the actual sound on the track is a little kinda softer on the attack of it so we raise the attack – a little bit, just to soften it.

Alright, now back up here to the tone. The note’s way too low, so bring it up to here. Waveform is not a saw, it’s a pulse and right now it’s full square but we actually need somewhere kinda in-between. Filter type is 24 dB low-pass. After experimenting with the sound, I found that this other 24 dB low-pass sounded more accurate.

Cutoff we can turn pretty far down to get that nice round tone.
And the resonance! The resonance is the key to this sound, this is where we get that very mallet-like percussive sound
by cranking the resonance. Just like that. Now it’s starting to sound much more like it.

Key tracking. For those of you who don’t know, key tracking essentially adjusts the cutoff. It raises it as you get higher on your keyboard, lowers it as you go lower. The whole point is that without it, higher sounds will sound duller than lower sounds that will sound brighter, so if you’re playing a part like this where you got high notes and low notes, you want to have key tracking on them to keep a nice, even, rounded sound
across the whole part.

That’s your basic sound, we’re gonna turn it down a little bit.
That’s your basic synth sound. Now we just need a nice delay. This is the default delay in TAL-DUB, it’s kinda close but not quite right. The timing’s right, you got eight note on the left, quarter note on the right. Damping, let’s see… a little damper. Very common to dampen the delayed sound so that the source sound is kinda bright in front and the delay is a little rounder behind it.

We don’t want any of this resonance, a nice smooth sound. The feedback, which is how many times the delay is….it’s a little long. we’re gonna cut it to about here and we could use a little bit more of that delayed sound. That’s your delay. Let’s bring the drums back in. The last thing is: for this track we’re gonna have a reverb on a synth so that we can just send any tracks we want to it.

This is a Church preset in Ableton but you can use whatever big hall reverb you have in your software. And we’re gonna send a pretty hefty amount to…. you know, cause it will add space and ambiance. And that’s the bouncy synth!

Next up is the bass, we’re gonna be using. TAL Noisemaker again.
I’m gonna turn it down a little bit before we start because it’s really loud. Also gonna turn down this sub for now. We are gonna use that but just not yet. First thing is I’m gonna bring up the second oscillator to match the first. So… Turn it down a little bit…and bring the pitch down for the second to match the first.

So now we have two identical waveforms at the same pitch with the same waveform and the same volume. So now, all you gotta do is detune the second one slightly. That gives us that swirling sound, kind of a chorusy effect. That’s kind of the main tone here.

Then we bring the sub oscillator back in to give the low end.
There is your bass. Sub oscillator in this synth is a square wave. It’s set that way permanently because that is the most typical sub oscillator waveform. It’s just a sturdy waveform a nice, solid low end. I almost always use square and have to with this synth.

So this is a bright version of the bass. The bass starts bright but then it goes down to a round, it’s like a round sound at the end So, we set the cutoff to where we want it to go. That’s gonna be the darkest point it reaches at the end of each note.
Let me bring the contour, which is the filter envelope amount back up to where we want the sound to start.

Yeah so we want them to go from that bright toward that cutoff.
We bring the sustain level all the way down to zero, which is the cutoff. And then we raise the decay until…about there. So it starts a little brighter and gets darker. Apparently the key step is resonance. Kinda gives it a wah-ish effect. Whenever you have a filter envelope in use, you can increase the resonance to really show what the envelope does and essentially give it a kinda wah effect.

Now, volume-wise…bring it back up. And that’s your bass sound.
Now the only difference is, this is very narrow in the center. In the actual track it’s kind of a wider sound. So, we’re gonna use a delay to widen it.

Now we don’t actually wanna hear all these little delays so I’ll show you how to just make it wide without hearing delay. First, make it wet 100%, we don’t want to hear the dry sound, then we’re gonna ignore these synced values, we’re gonna set the left delay to nothing and we’re gonna bring this one down to about here.

If you bring it too low, you get weird sounds. If you bring it too high, you hear separate notes. So, just right. No damping, no resonance. Feedback: too little and the sound starts to go away. Too much and you feed back, so boom. And there’s your wide bass. Narrow bass. Wide bass. That’s the bass. So, altogether we’ve got:

So now we’re just missing the string sound, the synth string sound- a very bread and butter, common sort of pad used a lot of tracks. Gonna turn it down first, cause it’s gonna get way too loud but if I don’t… ok! So what it sounds like right now is: Single notes, first off, but we’re playing multiple notes so we gotta give it more voices.

No sub-oscillator, that’s a little bit better. Too low so we’re gonna bring this up- oh too high. There we go. Now we want the same swirling effect that the bass had, so we bring on a second oscillator at the same volume as the first. Now the reason the pitch just went up is because when you put two waveforms that are identical on top of each other, it can do some funny things.

Watch as I detune it to get the swirling sound and the pitch will go back to normal. There we go. So there’s our basic sound. Now… We want it to drift off a little bit at the end. So that way when you go from chord to chord, it kinda tails off a little bit.

And right now we’re using a low pass, the whole thing open, but in reality the sound’s got both some of its highs and some of its lows kinda carved off. This means it’s using a band pass- a band pass literally cuts off some highs and lows, so when you put it at about the mid point, you can hear it. It’s not super bright but it doesn’t have a lot of lows either, it’s a nice way of thinning out a sound.

Now we actually want the sound to start bright and get dark kinda like the bass, but we want to go all the way down if you hold the key long enough. So it goes down to nothing but it starts at about there. So we wanna go down to nothing, sustain to zero to match the cutoff and decay up here. Nice.

Now you may have noticed we lost the tail, even though our amp release is still up, it’s no longer tailing off. That’s because when we let go of the key, the cutoff is slamming down super fast cause release is zero. So we bring up release to match our decay. So that if you let go of the key, hold the key, no matter what, the filter’s gonna operate the same way. So there’s your basic sound right there.

Only thing missing is some reverb. Give it a little wet. I’ll show you what it really sounds like. Puts a lot of space around it, we don’t need that much. Bring the volume back to… and that is the entire track.

That’s it! Thanks for watching, click the link at the top of the page to download all the things you need to recreate the track.
See ya next time.

Synth Tutorial: David Guetta’s “I Can Only Imagine”

In this synth tutorial, watch Joe Hanley, creator of Syntorial, remake David Guetta’s “I Can Only Imagine” from the ground up. You can also download the synth presets, midi files, audio and Ableton session. Plugins used in this video are:

VIDEO TRANSCRIPT

Welcome, today we’re going to be remaking David Guetta’s “I Can Only Imagine.” I’m using free plugins for all these synths, so anyone can download these plugins as well as presets and MIDI files and recreate the track in whatever software you use.

To download all these things, just click the link at the top of this page. It’ll take you to Syntorial’s Kickstarter page. If you scroll down to the bottom, you’ll see a few tutorial videos including this one and a few others, each with a download link above it, that will give you the presets in… Well let me show you actually. You will get this. You’ll get the audio file for the whole track. For you Ableton users here’s the session just ready to go. But if you don’t have Ableton, just open this tracks folder and you’ll see you got the MIDI file and the preset for VST included in there, so you can create it in whatever software you use.

While you’re at the Syntorial Kickstarter page, check out Syntorial. It is the ultimate synthesizer tutorial. A fully interactive training software that will turn you into a synth programing guru. So if you want to be able to do what I’m doing here, just recreating stuff by ear, this software will give you that ability. Let’s get started.

So starting with the drums, we got… The kick. Snare. Clap. Hi-hat And then, every once in a while, there’s this kind of very washy crash. And then you have this roll of snaps leading up to each snare. You could also use like really sort of muted claps, just as long as you use like a roll of them in a row. And that’s the drums.

Next, is the Bendy Synth. This is probably the most identifiable synth in the track. We’re going to use Synth 1 for this, a nice free VST synth. First, I’m going to initialize the sound, this is a preset that I made, it’s just a very basic, basic setting. It’s a good starting point for designing a sound.

Solo it. Now you hear like a ‘gon, gon gon,’ you hear like two notes overlapping. Set that up so that when you switch to Legato mode, they kind of push into each other, that way when we turn Portamento on, those overlapping notes that sounded really messy before, now create a nice bending effect.

And we’ll turn auto on, so that it only occurs when we actually play Legato. When we connect the notes the Portamento kicks in, if we don’t connect the notes, Portamento won’t kick in. Now we want a little bit more tail on this sound. Gives it a little length. Fills more space. First oscillator should be a Saw. Sub-oscillator, also a Saw we’re going to crank this, so the low end really kind of takes over the sound of this.

The second oscillator, I’m going to mix it 100% so you can hear it. Sorry, the third oscillator. We’re gonna pitch this one up an octave And mix it back in so that it’s… One of the more noticeable aspects, you want the high end to kind of stick out a bit.

Next, is the Filter, low-pass 24, we’re going to bring the cut off down. That’s the darkest point we want the sound to reach, this has a filter envelope on it though, you can hear it start bright and get lower, so we’re going to use the filter envelope. Bring the amount up, that sets where it starts, the bright attack but we want it to decay down to the cut off, so we’re going to make sure the sustain’s all the way to zero, ’cause the zero sustain equals your cut off. And we want the actual sweep down, to be a little faster, we want the decay to be faster, or sorry, slower. So bring that to 76.

And the release, set that way too, just in case we release a note early, that the filter will still sweep down at the same rate. Lastly, give it some resonance.

If you notice, I’m keeping Key Tracking off, that’s because if I bend the pitch up, and then hit a new note, like Portamento does, it would have a weird effect on the cut off, I’ll show you. Watch as it bends up. After the bend up, the note after, super bright! Sounds kind of unnatural and strange. Without it, it’s a little smoother, so no key tracking for this.

Next, we want this big, wide and smeared. Turn on some Unison, add a third voice, and really de-tune it, that Unison. This is where you get that kind of cool instability, intensity is from the unison de-tune. And then spread it. Then to make it even more kind of smeared and swirly, add some chorus and turn up.

There’s your basic sound, we want to give it some more attack though, we want to have a sharper attack transient. So, we already have a nice short decay to give us this, but the amplifier envelope sustains all the way up, so that means the decay is doing nothing, we’re going to bring this decay pretty farther out.

So you hear the attack transient, the front of this sound’s really jumping out. Now because of what we just did, the perceived volume of the sound has gone much lower, so we’re going to fix that by bringing this up. Bring in the other drums. And that’s your Bendy Synth.

Next, we have the Bass Synth. For this, we’re going to use TAL-Noisemaker. This is maybe one of the simplest synth patches ever created. Now it only one waveform, so we’re not going to use a sub-oscillator. And this also uses a portamento, kind of the way the Bendy Synth did, so, we want to, turn the portamento time up, to.. here. And turn on auto so it happens when you play Legato.

So, when you go up it’s a Legato note. There’s our Portamento, it’s already set to Saw. Now all you got to do, is bring the 24dB filter cut-off down. And that’s it. Let’s hear it with… The drums. It’s kind of in between the kicks of drum. And then the Bendy Synth. And that’s the bass.

Last, we have little Blippy Synths on the side, of the mix. For this we are also going to use TAL-Noisemaker. So, no sub-oscillator. And we want to make this sound very short, so bring the amp sustain all the way to zero, and bring the decay up, just a little, release the same, just in case. So, now no matter how you play this sound, it’s just going to be this tiny little short note.

We’re going to switch to a 12dB low pass. This gives you, tends to be a brighter sound. Honestly, with leads, basses I tend to go 24dB low pass, and then with pads and other stuff, I do 12dB, sounds like this, you know, I just kind of experiment between the two, but in general, you get kind of a thinner, not thinner but like a brighter, sort of, brighter sound with 12dB, 24 you get more of a shaped sound. So, when you want somebody to really cut through and have some serious shape and body to it, I use 24. Things that are a little bit lighter, want to be more natural sounding, little brighter sounding, 12dB, but really, you just experiment, switch between the two until you get the right sound.

In this case, we’re using 12dB, we’re going to bring the cut off down, to the darkest point we want the sound to be, and then we’re going to use the envelope to shape it, so we’re going to crank the contour. So the start of the sound, is its brightest, we want it to go down to this dark point we said, with the contour. So we set our sustain all the way to zero, so that it equals the cut off. And then, bring up. There you go. Set release to equal decay.

So now, it very quickly moves the filter down, from brightest to very dark. Gives it just a little bit of shape. Now that’s your basic synth sound. The only difference is that it’s on the left and right side of the mix, it’s a very wide sound, so we’re going to bring in a delay, and use it to make this wide sound, now in order to do this, we’re going to crank it 100% wide, so all we’re hearing is the delay sound. We don’t want any damping or resonance, so that the natural sound comes all the way through the delay.

Next, we are going to bring the feedback down, I’ll show you why in a second. Let’s see, all the way down to about here. Come back to that. Now, we’re going to set these delay times to manual, the left one, zero, so this sound is just going through with nothing happening to the left side, and the right side, you want to bring it down until it sounds like one sound. Now, going back to the feedback. That’s what happens if feedback’s too high. So, you wanna bring it down enough, too much and you lose the sound so, just the right amount. Now, it’s stereo!

Bring everything else back in. Here’s the bass. And then, the centerpiece. And then, we add a little bus compression, a little Mix Gel, as Ableton calls it. This started as a preset, that I selected: Mix Gel, but then you’ve gotta tweak the attack release threshold, really get it to start to kind of glue together and pulse a little bit. And then, to make this thing loud, just Brick Wall. And it makes it pump even more. Think I got a pretty severe amount of compression. Sounds good, so…

And that’s it! Once again, to download all of the MIDI files and presets, click the link at the top of this video, it’ll take you to Syntorial kick-starter page, scroll down to the bottom here, where you will see a bunch of tutorial videos, including this one, and click link above each video to download all of the goodies that come with it. And while you’re there, check out Syntorial, again, if you want to be able to do what I’m doing, programming all these sounds by ear, then this program will give you that ability, will train you to become just a great Synth Programmer. Thanks for watching!

Synth Tutorial: Clean Bandit “Rather Be”

Watch Joe Hanley, the creator of Syntorial, as he recreates the featured synth patch from Clean Bandit’s “Rather Be”. Video includes valuable info on finishing a synth patch, and making a simple sound interesting. Don’t forget to download the presets and MIDI files. Software and plugins used:

VIDEO TRANSCRIPT

Today we’re gonna be covering how to recreate the main synth patch from Clean Bandit’s Rather Be. Now this is, in and of itself a pretty simple patch, but it’s a great lesson on how to take something very simple and plain and make it interesting, which is important for a sort of a featured sound. In this track, it’s by itself at one point, or it’s just this in the vocal. So it needs to be interesting when you’re using it as kind of a featured sound. And this is a great lesson on how to take something plain and make it interesting.

Before we get to it, I just wanna quickly tell you about Syntorial. Syntorial is video game like training software, that’ll teach you how to program synth patches by ear. I designed it to give you the skills that I’m using in this video. I’m taking a sound that I hear in my head or a sound that I hear on a track and recreate it.

Now it does this by combining demonstration videos with interactive challenges in which you program patches on a built-in soft synth. And you can try for free just click the link that’s popping up on your screen now it’ll take you to our site where you can download the free demo.

So Rather Be, here’s the patch. Simple but it’s really playable and there’s a lot of details in there that make it interesting. So first thing I’m gonna do is just get rid of everything but the synth.

I’m using synth one and you can download these plugins -they’re all free plugins. You can download them from links that’ll pop up on the screen every time I open them. And we’re gonna start by initializing the synth. Now I created an initialized patch, and you can download that initialized patch along with all the presets used in this tutorial, by clicking the link that’s popping up on your screen now.

It’ll take you to our tutorial page on syntorial site and you can download all that stuff there along with the MIDI file. So if you’re curious on what the notes are here and how it’s played, you can use the MIDI file to look at that in detail. So after you install initialized patch, you can select it here. And now it sounds like this, Ops! Sorry. I’ve to go away from it there we go.

So it’s just a plain saw we’re already in poly mode. So we’ve got a bunch of voices more than enough. So we’re gonna switch to a sine wave and we’re almost all the way there. Now there’s a couple little tweaks I gotta do to the amp envelope.

I wanna take our sustain and set it to zero ’cause we want the sound to disappear to cut off no matter if we’re holding a key or playing it short, always want a short note for this one. So now we have this. it’s a little too short. So I’m gonna increase the decay and release just a tiny bit.

You know, ’cause the interesting thing is release is obvious, just how long it rings out for, but in this sort of short intervals, these little tweaks can make the difference between a full sound and a small sound. Just by extending that a little bit, we get a little bit more body, a little more length and just gives our sound a little bit more fullness.

So here’s our basic patch. You’d be fine to just use that. It’s very playable. It sounds nice. But again, you wanna make it interesting. You get this has to have something to it. If it’s gonna be a featured patch. So they do a number of things here.

The first one is they use an LFO to make it sound sort of slightly out-of-tune, sort of unstable almost like when you hear a record player, when the there’s a little glitch in the record and you hear everything like go down in pitch and back up. We wanna give it that sort of unstable wobble. So we activate the LFO and we wanna route it to oscillator one’s pitch, which it already is. So here’s oscillator one and two. That’s fine we’re not using two.

And then when you increase our amount just a little bit, if we overdo it it’s going to sound too crazy. Like obviously that’s way too much. So we wanna do something subtle. We wanna be able to hear the pitch change, but we still want to hear the notes.

And then we wanna slow down a bit ’cause right now it sounds a little too erratic. So now let’s compare LFO off. and on. So we’ve given it personality with this. We’ve taken something plain and simple that’s nothing to write home about and we’ve given it a little bit of personality by making the pitch a little unstable.

Next we wanna kind of give it some attitude. We wanna add some variation to it. And we’re gonna use overdrive for that. Now there’s a lot of overdrive distortion wave shaping plugins, free ones out there. But the ones I currently were using, I didn’t like. A lot of them give this sort of along with the crunch they also had this trashy white noise onto it, which I never really liked. So I went searching again for one and I found this one I really like called TubeDriver made by Nick Crow lab.

And it gives you that nice warm distortion that crunch without adding that papery trash onto it. So just by default it kind of sounds nice. It’s subtle but it’s a nice little, just subtle warming and subtle distortion. But we’re gonna tweak it a little bit here. Now I’m gonna turn this off for a second. One thing I forgot to mention.

You can notice that every time a notes played, you hear a little “tt”, little popping noise. Just little “tt”. Now this happens a lot with synths when they’re playing sine waves at the beginning of each note, you hear that little attack transient.

Now oftentimes you can get rid of it just by increasing the amp attack just a little bit, but in their case they liked it so they kept it in and they used it as the attack transient. We wanna actually increase it. We wanna make it louder. So all we gotta do is brighten the high end and TubeDriver got an EQ built into it, a high shelf. So we’re gonna turn this on. We’re gonna use one kilohertz range. We really wanna brighten a lot of the high end and watch listen to the popping sound as I turn this up.

Now since we increased the volume of the high end of this so much, it pushed the drive even more. So we got more crunch, more distortion. But we want it even more. So we’re gonna increase the drive knob a little bit. You can hear it especially with the chords, when you play more notes, the more signal you’re pushing into the overdrive. So you’re gonna get a little bit more distortion.

Now we also had too much volume, so we’re clipping so we’re gonna back off on the volume here. A lot of times when you add drive, you get an increase in volume so you can just compensate the volume now.

The last thing we have is this bias knob. Now the best way to learn what this is doing is to test the extremes. In fact, if you’re curious about what a knob or a button or whatever does the best thing you can do to figure out what it’s doing to your sound is always test the extremes, turn it all the way up, turn it all the way down and you’ll hear the differences and what this thing’s actually doing.

So let’s turn it all the way left. So almost gives it kind of like a steel drum, sort of metallic tone. All the way right basically that disappears. We get a much more pure overdrive sound with bias all the way up. And that’s what we want with this one.

Now this steel drum effect that’d be cool if you wanted to add some personality. But we already got some personality with that LFO wobble. So we’re gonna turn the Bias all the way up to get a nice, pure, clean overdrive. Without. So it’s sort of clean, Unassuming.

So this is nice, it brings it forward makes it a little more aggressive, gets us some attitude. And now when you play chords it’s a little crunchy, single notes it’s a little clean. It’s just a variation in the sound.

Next we’re gonna take some of the bulk out of this. It’s a little frumpy with EQ you can use any EQ you want. I went with 711 Hertz, negative 5.16 dB. And then when I cut, I like to narrow the cut little bit so I increased the Q to about here.

So let’s compare off, on, So just remove some of that frump. Now that’s an aesthetic choice. And for all I know the mixing engineer could have done that ’cause maybe it was interfering with the vocal who knows, but I’m just trying to imitate that patch as much as possible. And I like it. We take out some of that frump it cleans it up, it lanes it up a little bit, but it doesn’t take away too much body or bottom end.

And then last we wanna give this patch some life. So we’re gonna use reverb for that. I’m gonna use this free ambience plugin and by default the dry is all the way zero. So we’re just getting wet. So let’s bring our dry back to 100% and we don’t want this wet. Ops! Right now it’s extremely wet. So we’re gonna bring it down to about half for now later on we’re gonna bring it down even further, but I’m gonna leave it up here so you can hear what’s going on.

So first I wanna make it longer. I want that reverb to ring out a bit longer. And then I wanna shrink the room a little bit, just to make just the overall size of the reverb a little bit smaller. Then we want it all the way spread left and right. Really take advantage of our stereo field with this one. If you’re wearing headphones you can hear the difference now it’s nice and wide.

And then this reverb there’s a lot of space in it. It’s taking up tons of our mix and there’s a lot of bottom muddy washy end. So we wanna cut that out with an EQ and this reverb’s got an EQ built into it. So the first thing I’m gonna do is just bring our low-shelf cut all the way down. That helps but we wanna cut even more. So I’m gonna increase the frequency so we’re cutting more, more of the low end. There we go.

I’m gonna compare the difference between lowshelf cut with and without. That “oooh” that like low end is gone now. it’s much more cleaner sounding, but we still get the nice big room around it. Now we want this to be much more subtle. So we’re gonna bring our wet gain way down.

So let’s compare off. on. So it’s subtle but it brings it to life. ‘Cause since synths, particularly soft synths, any synth you’re plugging directly in, there’s no room around them. There’s no size around them. They’re like these very sterile sounds. When you add a little bit of reverb, even just a tiny bit like this or delay, it suddenly puts space around it. It adds life to it.

So LFO gives a personality, the drive gives it some attitude and variation, and the reverb gives us some life. And that’s it. Thanks for watching.