30,000+ students
1,000+ Ratings ⭐⭐⭐⭐⭐
Featured by Musictech, Keyboard Magazine & Electronic Musician

Synth Patch Checklist

Option anxiety. It’s a struggle that we synthesists must toil with ’til the end of our days. Overwhelmed are we by these magnificent creatures and their many knobs, buttons, sliders and switches, vying for our attention all at once… Read More

Synth Tutorial: David Guetta’s “I Can Only Imagine”

In this synth tutorial, watch Joe Hanley, creator of Syntorial, remake David Guetta’s “I Can Only Imagine” from the ground up. You can also download the synth presets, midi files, audio and Ableton session. Plugins used in this video are:

VIDEO TRANSCRIPT

Welcome, today we’re going to be remaking David Guetta’s “I Can Only Imagine.” I’m using free plugins for all these synths, so anyone can download these plugins as well as presets and MIDI files and recreate the track in whatever software you use.

To download all these things, just click the link at the top of this page. It’ll take you to Syntorial’s Kickstarter page. If you scroll down to the bottom, you’ll see a few tutorial videos including this one and a few others, each with a download link above it, that will give you the presets in… Well let me show you actually. You will get this. You’ll get the audio file for the whole track. For you Ableton users here’s the session just ready to go. But if you don’t have Ableton, just open this tracks folder and you’ll see you got the MIDI file and the preset for VST included in there, so you can create it in whatever software you use.

While you’re at the Syntorial Kickstarter page, check out Syntorial. It is the ultimate synthesizer tutorial. A fully interactive training software that will turn you into a synth programing guru. So if you want to be able to do what I’m doing here, just recreating stuff by ear, this software will give you that ability. Let’s get started.

So starting with the drums, we got… The kick. Snare. Clap. Hi-hat And then, every once in a while, there’s this kind of very washy crash. And then you have this roll of snaps leading up to each snare. You could also use like really sort of muted claps, just as long as you use like a roll of them in a row. And that’s the drums.

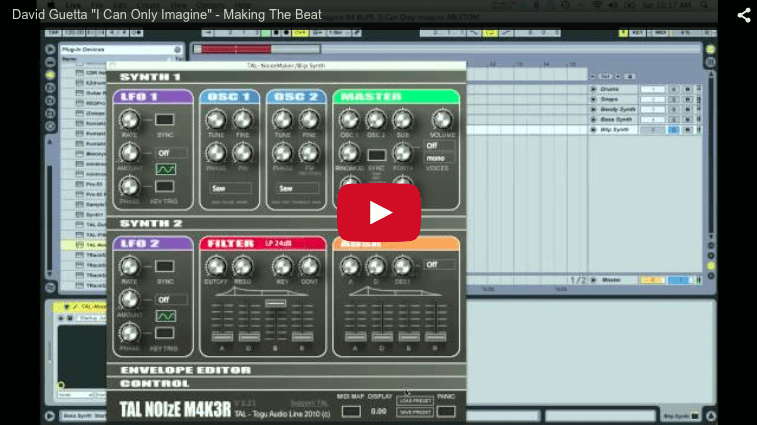
Next, is the Bendy Synth. This is probably the most identifiable synth in the track. We’re going to use Synth 1 for this, a nice free VST synth. First, I’m going to initialize the sound, this is a preset that I made, it’s just a very basic, basic setting. It’s a good starting point for designing a sound.

Solo it. Now you hear like a ‘gon, gon gon,’ you hear like two notes overlapping. Set that up so that when you switch to Legato mode, they kind of push into each other, that way when we turn Portamento on, those overlapping notes that sounded really messy before, now create a nice bending effect.

And we’ll turn auto on, so that it only occurs when we actually play Legato. When we connect the notes the Portamento kicks in, if we don’t connect the notes, Portamento won’t kick in. Now we want a little bit more tail on this sound. Gives it a little length. Fills more space. First oscillator should be a Saw. Sub-oscillator, also a Saw we’re going to crank this, so the low end really kind of takes over the sound of this.

The second oscillator, I’m going to mix it 100% so you can hear it. Sorry, the third oscillator. We’re gonna pitch this one up an octave And mix it back in so that it’s… One of the more noticeable aspects, you want the high end to kind of stick out a bit.

Next, is the Filter, low-pass 24, we’re going to bring the cut off down. That’s the darkest point we want the sound to reach, this has a filter envelope on it though, you can hear it start bright and get lower, so we’re going to use the filter envelope. Bring the amount up, that sets where it starts, the bright attack but we want it to decay down to the cut off, so we’re going to make sure the sustain’s all the way to zero, ’cause the zero sustain equals your cut off. And we want the actual sweep down, to be a little faster, we want the decay to be faster, or sorry, slower. So bring that to 76.

And the release, set that way too, just in case we release a note early, that the filter will still sweep down at the same rate. Lastly, give it some resonance.

If you notice, I’m keeping Key Tracking off, that’s because if I bend the pitch up, and then hit a new note, like Portamento does, it would have a weird effect on the cut off, I’ll show you. Watch as it bends up. After the bend up, the note after, super bright! Sounds kind of unnatural and strange. Without it, it’s a little smoother, so no key tracking for this.

Next, we want this big, wide and smeared. Turn on some Unison, add a third voice, and really de-tune it, that Unison. This is where you get that kind of cool instability, intensity is from the unison de-tune. And then spread it. Then to make it even more kind of smeared and swirly, add some chorus and turn up.

There’s your basic sound, we want to give it some more attack though, we want to have a sharper attack transient. So, we already have a nice short decay to give us this, but the amplifier envelope sustains all the way up, so that means the decay is doing nothing, we’re going to bring this decay pretty farther out.

So you hear the attack transient, the front of this sound’s really jumping out. Now because of what we just did, the perceived volume of the sound has gone much lower, so we’re going to fix that by bringing this up. Bring in the other drums. And that’s your Bendy Synth.

Next, we have the Bass Synth. For this, we’re going to use TAL-Noisemaker. This is maybe one of the simplest synth patches ever created. Now it only one waveform, so we’re not going to use a sub-oscillator. And this also uses a portamento, kind of the way the Bendy Synth did, so, we want to, turn the portamento time up, to.. here. And turn on auto so it happens when you play Legato.

So, when you go up it’s a Legato note. There’s our Portamento, it’s already set to Saw. Now all you got to do, is bring the 24dB filter cut-off down. And that’s it. Let’s hear it with… The drums. It’s kind of in between the kicks of drum. And then the Bendy Synth. And that’s the bass.

Last, we have little Blippy Synths on the side, of the mix. For this we are also going to use TAL-Noisemaker. So, no sub-oscillator. And we want to make this sound very short, so bring the amp sustain all the way to zero, and bring the decay up, just a little, release the same, just in case. So, now no matter how you play this sound, it’s just going to be this tiny little short note.

We’re going to switch to a 12dB low pass. This gives you, tends to be a brighter sound. Honestly, with leads, basses I tend to go 24dB low pass, and then with pads and other stuff, I do 12dB, sounds like this, you know, I just kind of experiment between the two, but in general, you get kind of a thinner, not thinner but like a brighter, sort of, brighter sound with 12dB, 24 you get more of a shaped sound. So, when you want somebody to really cut through and have some serious shape and body to it, I use 24. Things that are a little bit lighter, want to be more natural sounding, little brighter sounding, 12dB, but really, you just experiment, switch between the two until you get the right sound.

In this case, we’re using 12dB, we’re going to bring the cut off down, to the darkest point we want the sound to be, and then we’re going to use the envelope to shape it, so we’re going to crank the contour. So the start of the sound, is its brightest, we want it to go down to this dark point we said, with the contour. So we set our sustain all the way to zero, so that it equals the cut off. And then, bring up. There you go. Set release to equal decay.

So now, it very quickly moves the filter down, from brightest to very dark. Gives it just a little bit of shape. Now that’s your basic synth sound. The only difference is that it’s on the left and right side of the mix, it’s a very wide sound, so we’re going to bring in a delay, and use it to make this wide sound, now in order to do this, we’re going to crank it 100% wide, so all we’re hearing is the delay sound. We don’t want any damping or resonance, so that the natural sound comes all the way through the delay.

Next, we are going to bring the feedback down, I’ll show you why in a second. Let’s see, all the way down to about here. Come back to that. Now, we’re going to set these delay times to manual, the left one, zero, so this sound is just going through with nothing happening to the left side, and the right side, you want to bring it down until it sounds like one sound. Now, going back to the feedback. That’s what happens if feedback’s too high. So, you wanna bring it down enough, too much and you lose the sound so, just the right amount. Now, it’s stereo!

Bring everything else back in. Here’s the bass. And then, the centerpiece. And then, we add a little bus compression, a little Mix Gel, as Ableton calls it. This started as a preset, that I selected: Mix Gel, but then you’ve gotta tweak the attack release threshold, really get it to start to kind of glue together and pulse a little bit. And then, to make this thing loud, just Brick Wall. And it makes it pump even more. Think I got a pretty severe amount of compression. Sounds good, so…

And that’s it! Once again, to download all of the MIDI files and presets, click the link at the top of this video, it’ll take you to Syntorial kick-starter page, scroll down to the bottom here, where you will see a bunch of tutorial videos, including this one, and click link above each video to download all of the goodies that come with it. And while you’re there, check out Syntorial, again, if you want to be able to do what I’m doing, programming all these sounds by ear, then this program will give you that ability, will train you to become just a great Synth Programmer. Thanks for watching!

Synth Tutorial: Clean Bandit “Rather Be”

Watch Joe Hanley, the creator of Syntorial, as he recreates the featured synth patch from Clean Bandit’s “Rather Be”. Video includes valuable info on finishing a synth patch, and making a simple sound interesting. Don’t forget to download the presets and MIDI files. Software and plugins used:

VIDEO TRANSCRIPT

Today we’re gonna be covering how to recreate the main synth patch from Clean Bandit’s Rather Be. Now this is, in and of itself a pretty simple patch, but it’s a great lesson on how to take something very simple and plain and make it interesting, which is important for a sort of a featured sound. In this track, it’s by itself at one point, or it’s just this in the vocal. So it needs to be interesting when you’re using it as kind of a featured sound. And this is a great lesson on how to take something plain and make it interesting.

Before we get to it, I just wanna quickly tell you about Syntorial. Syntorial is video game like training software, that’ll teach you how to program synth patches by ear. I designed it to give you the skills that I’m using in this video. I’m taking a sound that I hear in my head or a sound that I hear on a track and recreate it.

Now it does this by combining demonstration videos with interactive challenges in which you program patches on a built-in soft synth. And you can try for free just click the link that’s popping up on your screen now it’ll take you to our site where you can download the free demo.

So Rather Be, here’s the patch. Simple but it’s really playable and there’s a lot of details in there that make it interesting. So first thing I’m gonna do is just get rid of everything but the synth.

I’m using synth one and you can download these plugins -they’re all free plugins. You can download them from links that’ll pop up on the screen every time I open them. And we’re gonna start by initializing the synth. Now I created an initialized patch, and you can download that initialized patch along with all the presets used in this tutorial, by clicking the link that’s popping up on your screen now.

It’ll take you to our tutorial page on syntorial site and you can download all that stuff there along with the MIDI file. So if you’re curious on what the notes are here and how it’s played, you can use the MIDI file to look at that in detail. So after you install initialized patch, you can select it here. And now it sounds like this, Ops! Sorry. I’ve to go away from it there we go.

So it’s just a plain saw we’re already in poly mode. So we’ve got a bunch of voices more than enough. So we’re gonna switch to a sine wave and we’re almost all the way there. Now there’s a couple little tweaks I gotta do to the amp envelope.

I wanna take our sustain and set it to zero ’cause we want the sound to disappear to cut off no matter if we’re holding a key or playing it short, always want a short note for this one. So now we have this. it’s a little too short. So I’m gonna increase the decay and release just a tiny bit.

You know, ’cause the interesting thing is release is obvious, just how long it rings out for, but in this sort of short intervals, these little tweaks can make the difference between a full sound and a small sound. Just by extending that a little bit, we get a little bit more body, a little more length and just gives our sound a little bit more fullness.

So here’s our basic patch. You’d be fine to just use that. It’s very playable. It sounds nice. But again, you wanna make it interesting. You get this has to have something to it. If it’s gonna be a featured patch. So they do a number of things here.

The first one is they use an LFO to make it sound sort of slightly out-of-tune, sort of unstable almost like when you hear a record player, when the there’s a little glitch in the record and you hear everything like go down in pitch and back up. We wanna give it that sort of unstable wobble. So we activate the LFO and we wanna route it to oscillator one’s pitch, which it already is. So here’s oscillator one and two. That’s fine we’re not using two.

And then when you increase our amount just a little bit, if we overdo it it’s going to sound too crazy. Like obviously that’s way too much. So we wanna do something subtle. We wanna be able to hear the pitch change, but we still want to hear the notes.

And then we wanna slow down a bit ’cause right now it sounds a little too erratic. So now let’s compare LFO off. and on. So we’ve given it personality with this. We’ve taken something plain and simple that’s nothing to write home about and we’ve given it a little bit of personality by making the pitch a little unstable.

Next we wanna kind of give it some attitude. We wanna add some variation to it. And we’re gonna use overdrive for that. Now there’s a lot of overdrive distortion wave shaping plugins, free ones out there. But the ones I currently were using, I didn’t like. A lot of them give this sort of along with the crunch they also had this trashy white noise onto it, which I never really liked. So I went searching again for one and I found this one I really like called TubeDriver made by Nick Crow lab.

And it gives you that nice warm distortion that crunch without adding that papery trash onto it. So just by default it kind of sounds nice. It’s subtle but it’s a nice little, just subtle warming and subtle distortion. But we’re gonna tweak it a little bit here. Now I’m gonna turn this off for a second. One thing I forgot to mention.

You can notice that every time a notes played, you hear a little “tt”, little popping noise. Just little “tt”. Now this happens a lot with synths when they’re playing sine waves at the beginning of each note, you hear that little attack transient.

Now oftentimes you can get rid of it just by increasing the amp attack just a little bit, but in their case they liked it so they kept it in and they used it as the attack transient. We wanna actually increase it. We wanna make it louder. So all we gotta do is brighten the high end and TubeDriver got an EQ built into it, a high shelf. So we’re gonna turn this on. We’re gonna use one kilohertz range. We really wanna brighten a lot of the high end and watch listen to the popping sound as I turn this up.

Now since we increased the volume of the high end of this so much, it pushed the drive even more. So we got more crunch, more distortion. But we want it even more. So we’re gonna increase the drive knob a little bit. You can hear it especially with the chords, when you play more notes, the more signal you’re pushing into the overdrive. So you’re gonna get a little bit more distortion.

Now we also had too much volume, so we’re clipping so we’re gonna back off on the volume here. A lot of times when you add drive, you get an increase in volume so you can just compensate the volume now.

The last thing we have is this bias knob. Now the best way to learn what this is doing is to test the extremes. In fact, if you’re curious about what a knob or a button or whatever does the best thing you can do to figure out what it’s doing to your sound is always test the extremes, turn it all the way up, turn it all the way down and you’ll hear the differences and what this thing’s actually doing.

So let’s turn it all the way left. So almost gives it kind of like a steel drum, sort of metallic tone. All the way right basically that disappears. We get a much more pure overdrive sound with bias all the way up. And that’s what we want with this one.

Now this steel drum effect that’d be cool if you wanted to add some personality. But we already got some personality with that LFO wobble. So we’re gonna turn the Bias all the way up to get a nice, pure, clean overdrive. Without. So it’s sort of clean, Unassuming.

So this is nice, it brings it forward makes it a little more aggressive, gets us some attitude. And now when you play chords it’s a little crunchy, single notes it’s a little clean. It’s just a variation in the sound.

Next we’re gonna take some of the bulk out of this. It’s a little frumpy with EQ you can use any EQ you want. I went with 711 Hertz, negative 5.16 dB. And then when I cut, I like to narrow the cut little bit so I increased the Q to about here.

So let’s compare off, on, So just remove some of that frump. Now that’s an aesthetic choice. And for all I know the mixing engineer could have done that ’cause maybe it was interfering with the vocal who knows, but I’m just trying to imitate that patch as much as possible. And I like it. We take out some of that frump it cleans it up, it lanes it up a little bit, but it doesn’t take away too much body or bottom end.

And then last we wanna give this patch some life. So we’re gonna use reverb for that. I’m gonna use this free ambience plugin and by default the dry is all the way zero. So we’re just getting wet. So let’s bring our dry back to 100% and we don’t want this wet. Ops! Right now it’s extremely wet. So we’re gonna bring it down to about half for now later on we’re gonna bring it down even further, but I’m gonna leave it up here so you can hear what’s going on.

So first I wanna make it longer. I want that reverb to ring out a bit longer. And then I wanna shrink the room a little bit, just to make just the overall size of the reverb a little bit smaller. Then we want it all the way spread left and right. Really take advantage of our stereo field with this one. If you’re wearing headphones you can hear the difference now it’s nice and wide.

And then this reverb there’s a lot of space in it. It’s taking up tons of our mix and there’s a lot of bottom muddy washy end. So we wanna cut that out with an EQ and this reverb’s got an EQ built into it. So the first thing I’m gonna do is just bring our low-shelf cut all the way down. That helps but we wanna cut even more. So I’m gonna increase the frequency so we’re cutting more, more of the low end. There we go.

I’m gonna compare the difference between lowshelf cut with and without. That “oooh” that like low end is gone now. it’s much more cleaner sounding, but we still get the nice big room around it. Now we want this to be much more subtle. So we’re gonna bring our wet gain way down.

So let’s compare off. on. So it’s subtle but it brings it to life. ‘Cause since synths, particularly soft synths, any synth you’re plugging directly in, there’s no room around them. There’s no size around them. They’re like these very sterile sounds. When you add a little bit of reverb, even just a tiny bit like this or delay, it suddenly puts space around it. It adds life to it.

So LFO gives a personality, the drive gives it some attitude and variation, and the reverb gives us some life. And that’s it. Thanks for watching.

Synth Tutorial: FM on the Minimoog Voyager

In this synth tutorial, watch Joe Hanley, the creator of Syntorial, as he demonstrates how to use FM on the Minimoog Voyager. This video is an excerpt from the Minimoog Voyager Lesson Pack for Syntorial, which contains 34 videos, totaling 2 hours and 22 minutes, and covers every inch of this analog classic.

VIDEO TRANSCRIPT
In this video, I’ll be showing you how to use FM. Also known as frequency modulation on the Voyager. I’ll be going over how to make different bell tones as well as how to make an aggressive distorted tone.

Now, this following clip is an excerpt from the Minimoog Voyager lesson pack for Syntorial. Which has 34 videos, totaling two hours and 22 minutes, that go over every inch of the Voyager. And it’s free for all registered Syntorial users.

Now, for those who don’t know, Syntorial is video game like training software. That teaches you how to program synth patches by ear. It does this by combining video demonstrations with interactive challenges in which you program patches on a built-in soft synth. And the Minimoog Voyager lesson pack, adds 34 videos that show you how to take the things you’ve learned in Syntorial and do it on the Voyager.

I’ve made a special demo available for you guys to download. Includes 18 lessons and five Voyager videos by clicking the link that’s appearing on your screen now.

Now before we get started, you wanna initialize your synth. This will make programming a lot easier. And I recommend going to the webpage below and following these instructions right here in this box.

Now not only will show you how to use the Voyager’s built-in initialization function, but more importantly, it adds steps that will show you how to change the phase of the synth, so it matches what you hear. Because if you just use the initialization function, the inside of the synth turns into a very simple sound, but the phase of it doesn’t change obviously, which can be kinda confusing particularly for those of you who are a little newer to the Voyager or just newer to programming. So I recommend following these steps before you get started. Here we go.

Voyager FM. The FM is a little trickier to program on the Voyager, compared to Syntorial. The routing is fairly simple, oscillator three is our modulator, oscillator one is our carrier. So we wanna hear the carrier. We don’t wanna hear the modulator. So only oscillator one will be on. And then you simply just turn the FM switch on.

Now with Syntorial we’re doing sine waves. There are no sine waves in the waveform selection. We’ll do the next best thing. We’ll turn both to triangles. Now you’re not getting much yet. So we need to turn this frequency up and I like my favorite spot is around the sixth notch.

Start to hear some of that FM. You can get it in the other values, but it changes the overall pitch. This keeps, C sounding like C. Whatever note you’re playing, sounds like the note you’re playing.

Now I’m gonna increase our AMP release a little bit, just to give us a little bit more of a bell-like quality. Good.

Now, Oscillator three’s waveform knob, in this situation, it’s kinda like Syntorial’s FM knob. As you turn it up, you get a little bit brighter, go towards saw. You can go all way to about this notch here. Compare it to, little rounder. Little brighter. So it’s kinda like Syntorial’s FM knob. Go pass that, it starts to get dissonant.

Now, if I wanna change the overall range of my bells, I can turn both octaves up. And then we can take oscillator three’s octave and move it down. It gets a little dissonant but it’s a little bit more FM-ish. A little bit more metallic. Could even go down one further and it gets pretty aggressive. We’ll go back to four.

Now, one thing you might notice, is as I jumped from note to note, sometimes it takes a second for the pitch to kinda catch up. It kinda sound like… So it’s like the very beginning of your notes sounds sort of out of tune until it kinda comes together.

In some ways, this can be kind of cool, but if you don’t want it, what you can do a sort of mask it with a little bit of glide. So I’m turning the glide on. And now… now, if I’m intentionally bending between the notes, then you won’t really notice that accidental FM bend between the notes. So that’s how you can get your nice sort of bell like metallic tone with FM.

There’s another great use we can get from FM and the Voyager. And that’s really nice, aggressive, distorted tone. To do this, I’m gonna change oscillator one to square, oscillator three to about there a little bit above the saw, right at the saw graphic actually.

We’re gonna bring oscillator one back down to its regular octave, our default octave. And we’re going to bring octave three, one octave below that and then set its frequency back to zero. And here’s what it sounds like. Let’s turn glide off.

Really nice aggressive distorted sound. And you can adjust the wave. And I like it right around the saw. And you could bring oscillator three’s octave one lower to get even nastier. And then we can bring the frequency back up, if you want to add a little bit more of that metallic bellish-like quality to it. Really nice distorted tone.

Lastly, it’s really easy to come across a dissonant tone with FM. Set it to any random frequency, random wave forms, and you could come across as sometimes bizarre sound effects and dissonant sounds. So it’s a great way to create sort of experimental sound effects and things like that.

So your task is to create three new patches, one, a smooth bell tone like we did with the triangles, another, a nice heavy distorted tone. And then lastly, something just bizarre from a random setting of your choice.

All right, Well, thanks for watching. And just so you know, we’ve got a lot of other free videos like this available on Syntorial’s website. All you gotta do is sign up for our newsletter by clicking the link that’s popping up on your screen now, and we’ll send you a link to a page full of videos and articles.

Synth Tutorial: Using Two Filters

In this synth tutorial, watch Joe Hanley, the creator of Syntorial, as he demonstrates how and why to use two filters on a synth. Using dual or parallel filters, can give you very detailed control over the shape, body, and weight of your sound. This video is an excerpt from the Z3TA+ 2 Lesson Pack for Syntorial, which contains 37 videos, over 3 hours of footage, and covers every inch of Z3TA+ 2.

VIDEO TRANSCRIPT

In this video, I’m gonna be showing you the many ways in which we could use two filters on a synth and more importantly, how and why you would use two filters.

Now this following video clip is actually an excerpt from the “Z3TA + 2 Lesson Pack for Syntorial,” which has 37 videos that cover every inch of Z3TA + 2 and it’s free for Syntorial users.

Now for those of you who don’t know, Syntorial is a videogame-like training software that teaches you how to program synth patches by ear. It combines a video demonstration with interactive challenges in which you program over 700 patches on a built-in soft synth. The Z3TA + 2 lesson pack adds 37 videos to this that cover Z3TA + 2 and help you transition from the Syntorial synth to Z3TA + 2. If you’d like to try the Syntorial demo, just click the link that’s popping up on the screen now. And if you wanna try a special demo that has some Z3TA + 2 videos included, just click the link that’s popping up now.

Now in the following excerpt, I just finished talking about some filter types, particularly these at the bottom, which I call character filters. Your formants and your resos, which make your synth talk, and your comb, which kinda gives it a trashy, flanging sound. Here we go.

Now, this filter and these talking filters, we can refer to these as character filters. They’re not necessarily there to control your brightness or shade, they’re more to add a distinct sound to your patch. But what if you need to then shape it? Like for example, this comb filter, is pretty bright. What if I want to round it out a bit? That’s where dual comes in.

Select dual and now my sound is running through filter one and then running through filter two. So what I could do is throw a 12 dB low-pass on and now I could take some of the highs off. So it’s great way to take a character filter and then shape it.

Another example would be, let’s say we got a Reso-2 BPF, let me turn this guy off. So let’s say I like that sound but it’s a little too bulky. I can grab a high-pass and just take a little bit of that bottom end off. Again, character shaping.

Now you can also use this dual filter layout for when you want two shaping filters so you can really get fine-tune precise control of your sound. Let’s see, for example, let’s say we got a typical low-pass on the first part.

Let’s say we like our sound, but there’s something in there we don’t like. Well now we can employ a reject filter. So now we get our rounding and we get to cut out that piece that we don’t like. Or another example is, let’s say we’re going for a band-pass filter-like effect, but we need more detailed control over that band-pass. You can kinda make your own. Use an LPF here, a low-pass to cut your highs, and then here, use a high-pass to cut your lows. And now you have individual control over the highs and lows.

And you could even modulate just one of them. So we get that low-pass modulation and keep this bottom chunk off the entire time. Now, you might ask yourself, “If my sound’s going through filter one and then filter two, “what’s the point of this?” Well in reality, what we have here are four filters. This filter one and filter two fader, what it really refers to are what Z3TA calls filter buses.

When we’re in parallel mode, filter one bus just contains filter one. Filter two bus just contains filter two, like you’d expect. In dual mode, filter one bus contains filter one and filter two. Filter two bus contains a copy, that same filter one and same filter two. So what’s the difference? The difference is that filter one bus is controlled with this pan and level. Filter two bus controlled with this pan and this level. These guys are gonna be the same on both buses. But these controls are different.

So this is great if you got multiple oscillators, you want them running through a dual filter setup, but you want one oscillator on the left, and another oscillator on the right, plain and simple. So let’s say we’ve got this sort of band-pass shaping thing going on. And let’s say we got SAW in one oscillator and then we’ve got maybe, I don’t know, let’s try an additive. There we go.

Let’s say I want one on the left and one on the right, well, just like I did with parallel. I route my SAW onto oscillator one, my additive to filter two. And now I have my width. So now I get my dual structure and I get my width.

Now one thing to keep in mind however, some of these filter types don’t play so nice with this spreading when in dual mode. Particularly these talking ones. So you see we kind of lost our width. With these filters we had it, lost it with that. So be mindful of that. With these character filters, some of them, you might lose some of that width.

Now, going back to parallel, let’s initialize. Now we’ve used parallel mode for pretty much the whole time. And we know some basic uses for it, like we just wanna use one filter, we route it to just one filter. Or when we’re using multi-mode, we need to be in parallel mode and then we can decide if we want to have eight voices by being in between and then we can pan them far left and far right. Let’s fix these pan ops here.

However, there’s one other great use and that’s mixing filters. Let me show you an example of that right now. Let’s say we’re going for a talking-like effect here. And I’m gonna modulate this with an envelope.

So we’ve got our basic talking sound here, but one thing I don’t like about it, doesn’t have very much body to it. So, let’s switch over to filter two and use just a simple low-pass. So we got body, voice and now I can mix them together. Without body. So it’s a great way to take two elements of your sound and mix them together. It’s an excellent layering tool.

Another example, let’s take this talking-like effect and route our SAW just to that. And let’s bring in another oscillator, let’s say a square, and we’ll set it down an octave so it’s like a sub-oscillator and route that just to the rounding filter. So now our sub-oscillator isn’t subject to the talking effect. It’s strictly just a nice, round bottom. And our other oscillator gets to do all of the talking. So parallel, when you use this way is an excellent layering tool.

So in summary, with this filter routing, our dual is great for combining a character filter with a shaping filter or to create a really precise shaping filter with the two. While our parallel is great for just a single filter use, multi-use, and a layering use.

And like in the last video, I mentioned that experimentation is a great way to learn about these things, but also really look through the presets and look how they use their filters. Check out how they combine two filters and what it sounds like.

Your task is to create three new patches, utilizing these different filter setups and filter functions and filter types.

All right, well thanks for watching. And just so you know, we got a lot of other free videos like this available on Syntorial’s website. All you gotta do is sign up for our newsletter by clicking the link that’s popping up on your screen now and we’ll send you a link to a page full of videos and articles. Thanks for watching.